Cut/Fill Contour #
Sometimes, the users have multiple boundaries in their project file and want to get the cut and fill area of a certain boundary only. With a new feature in MiTS 3, Boundary Selection, users can now view the cut and fill areas in which boundary they want.
The example project file contains 2 boundaries; Zone A and Zone B. This is a simple step to view the cut and fill area in the selected boundary only.
- After the calculation of the DTM method, the contour button is activated. Click once on the Contour button to view its layout.
- By default, the Mesh button is activated and all Boundaries present in the project file are ticked.
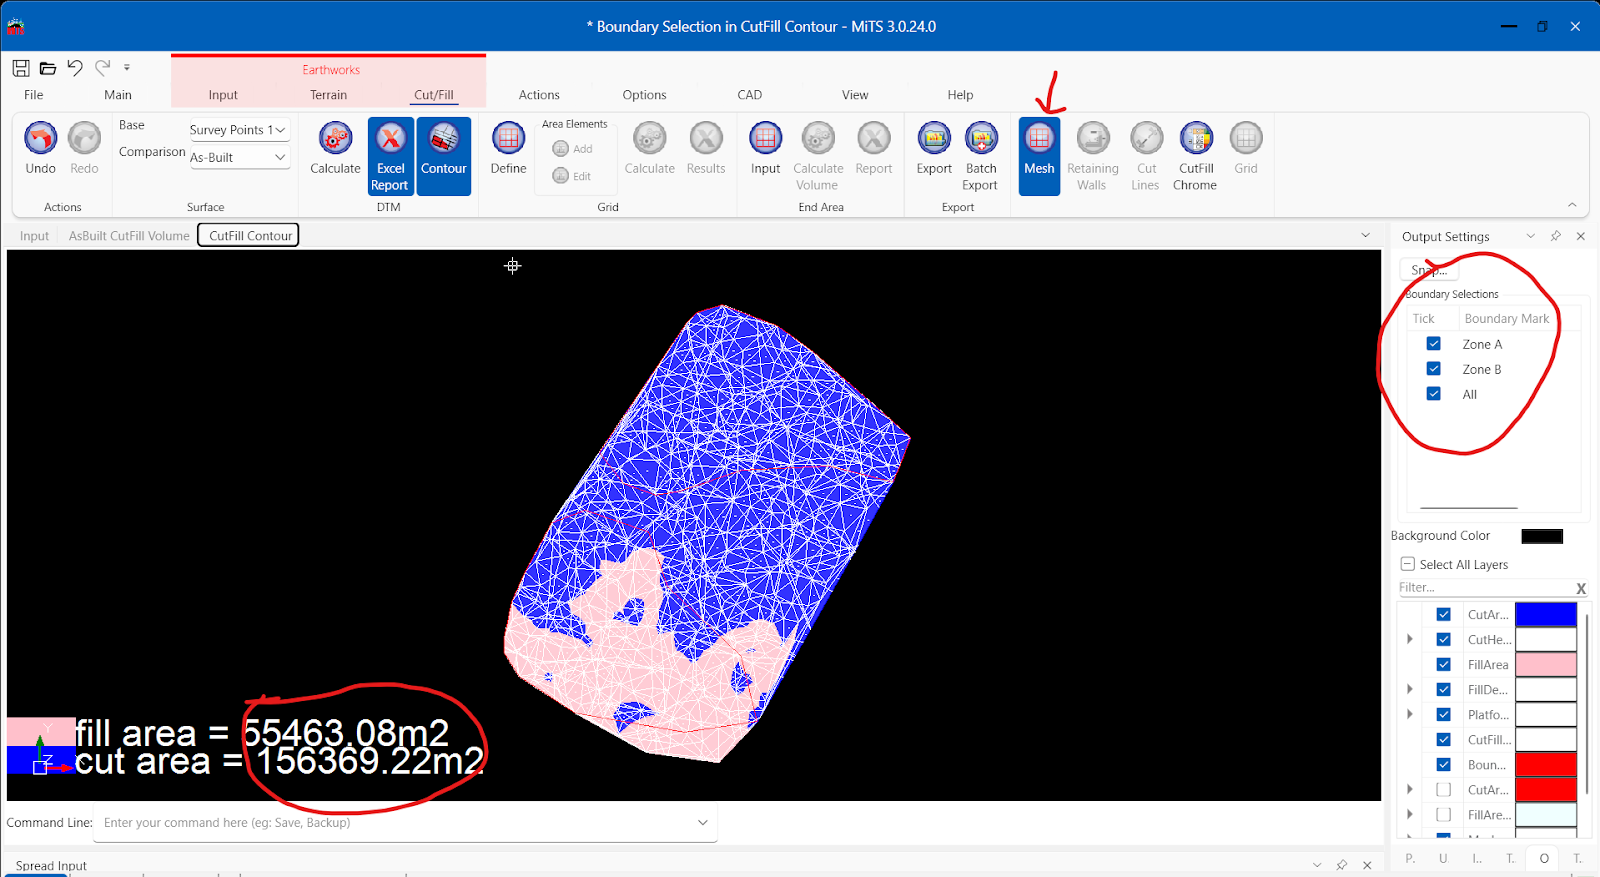
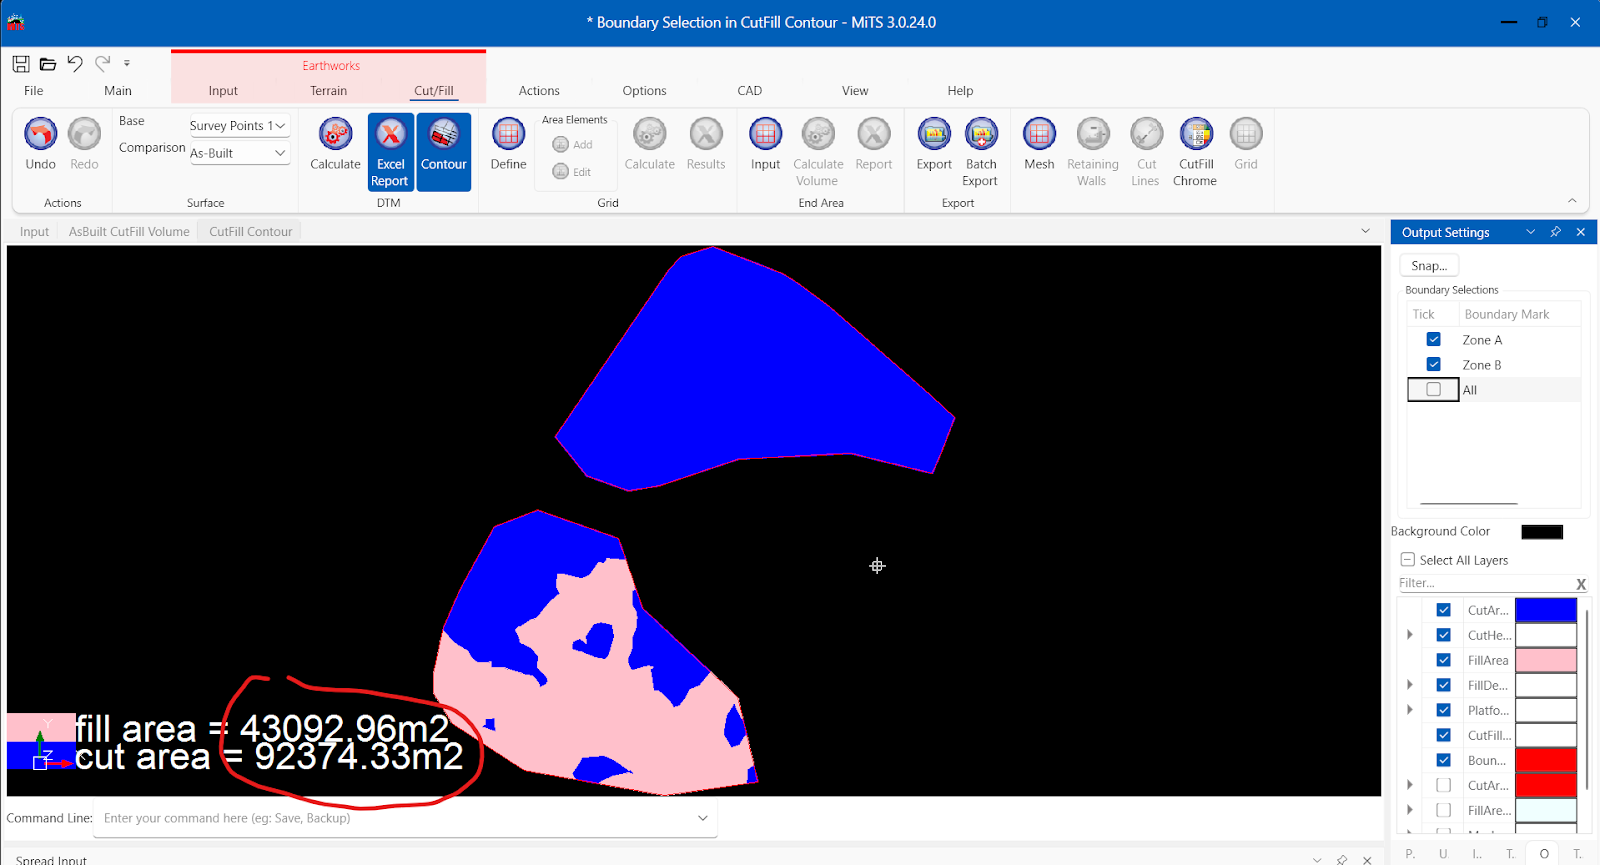
- Turn off the Mesh feature by clicking once on the Mesh button.
- At the RHS panel, untick ‘All’ in the Boundary Selection section. Notice that the total area is changed as it only shows the cut and fill area of the inside project boundary.
(The ‘All’ boundary mark represents the total cut and fill area of the project including all the inside and outside the project boundary. Untick this layer will show only the cut and fill area inside the boundary selected)
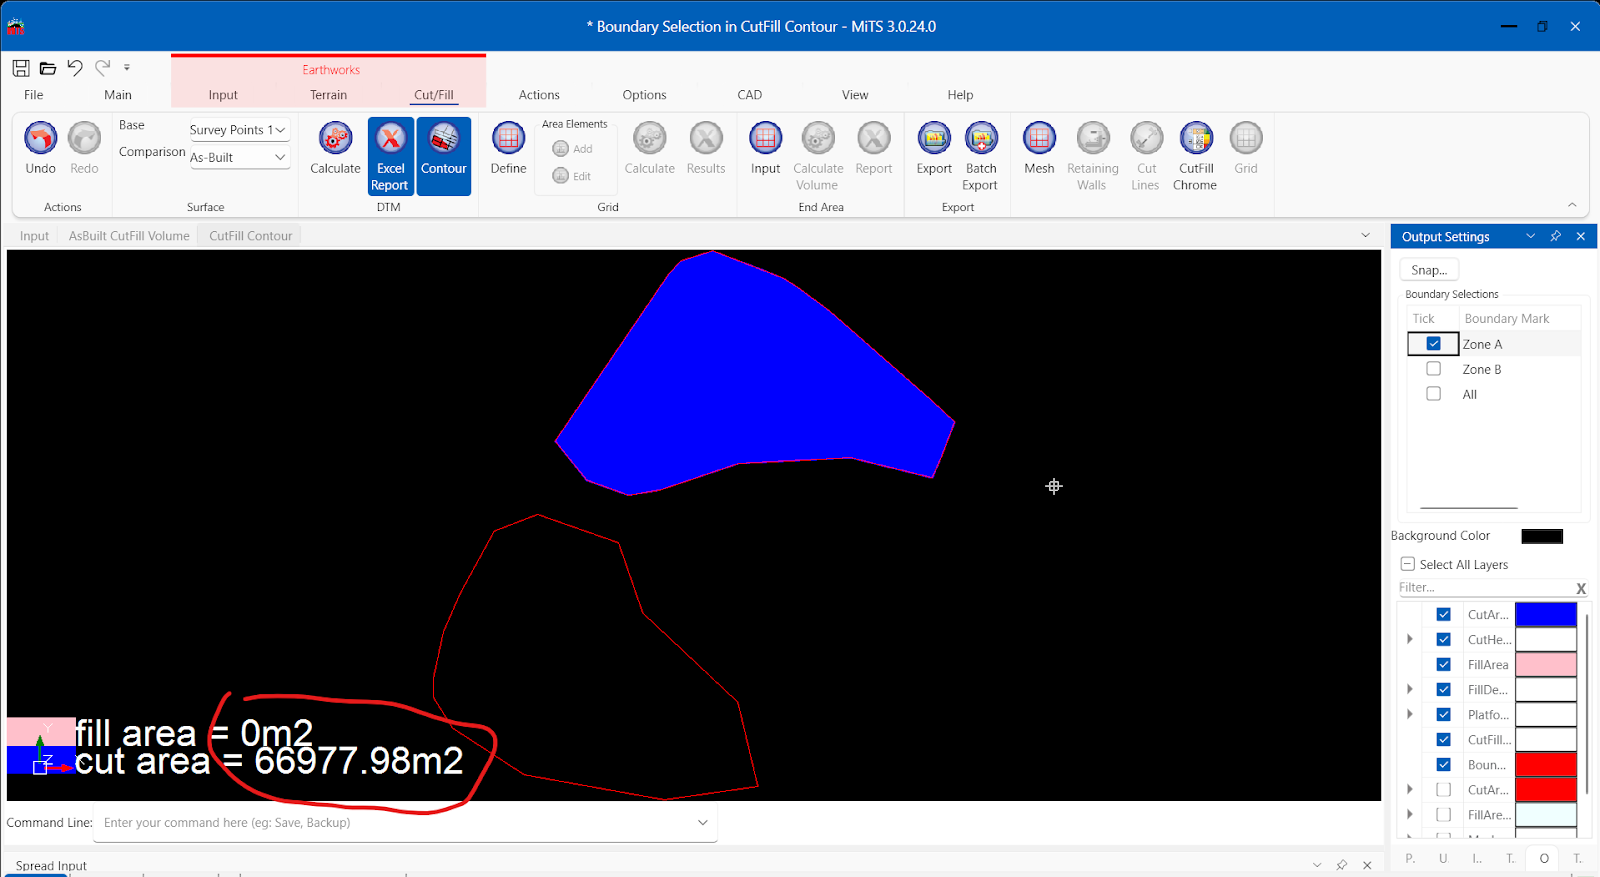
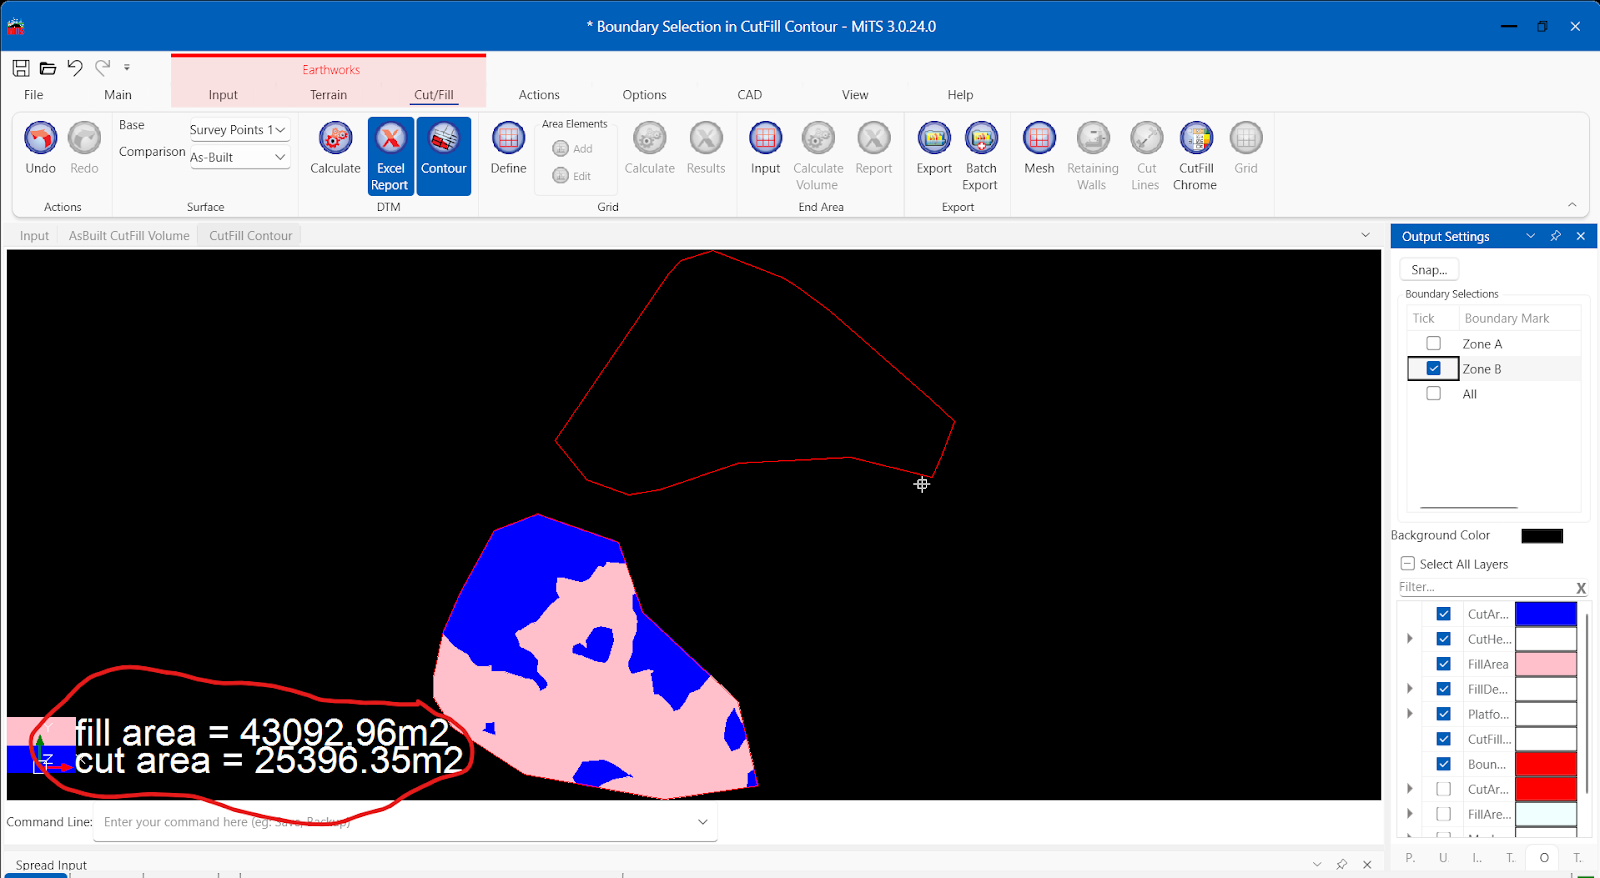
- Tick any boundary you want to see its cut and fill area.
Cut Section #
Project file here
To hide unwanted cut sections in particular boundaries, users can untick the corresponding boundary checkbox under the Boundary Selections.
Once this is done, the earthwork regions (cut and fill area) that fall within the unticked boundary will be excluded in the cut section section view. This helps to keep the section clean and highlights only the areas of interest.


I’m the Benevolent Dictator for Life for MiTS Software cum Editor of this website. Read more here.
You can also contact me at soonhui@mes100.com


