Vertical Line #
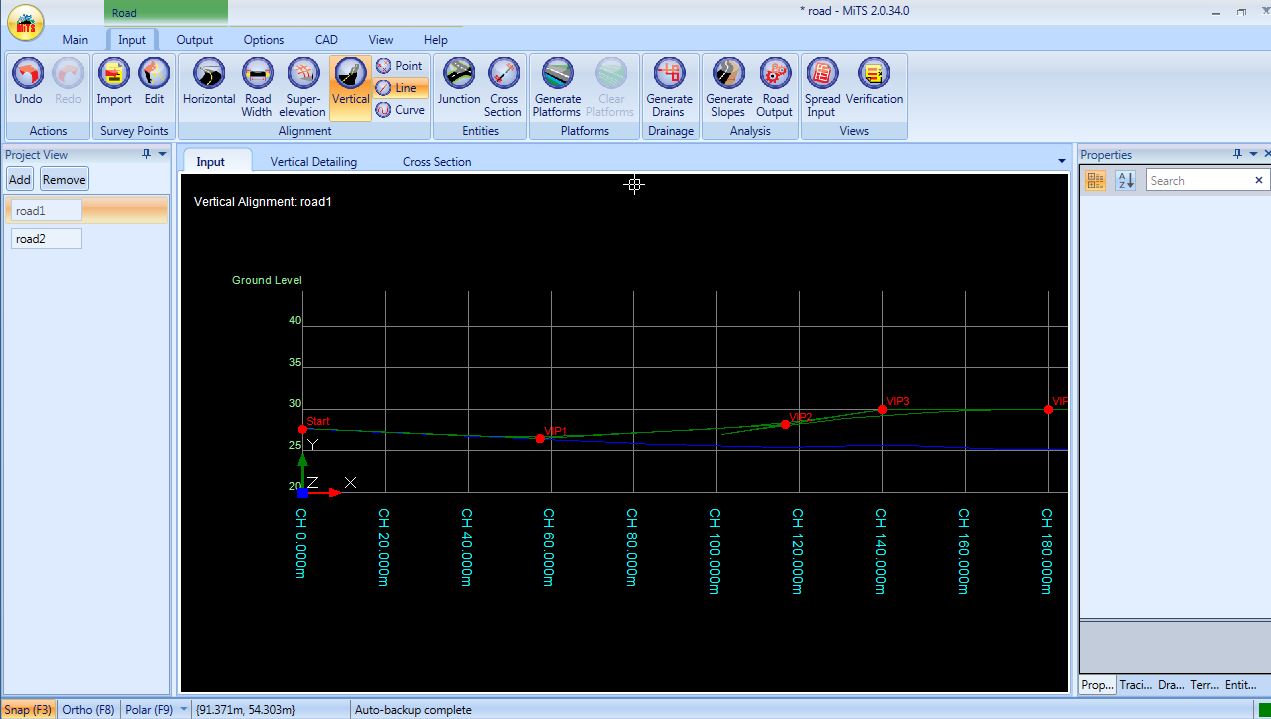
Select Vertical Alignment and Line icon to input the elevation of the road. The road elevation can be easily inputted on the drawing with the tracing and snapping feature.

Click once on the screen to activate the snapping, the mouse cursor will turn into precision select, + pointer.
Then, input the elevation at Chainage 0 and other chainages. A straight line will be constructed to connect one VIP point to another point. A curve will be generated at the intersection of any 2 construction lines.
Users can right-mouse click to cancel the input mode or press ESC button to cancel all.
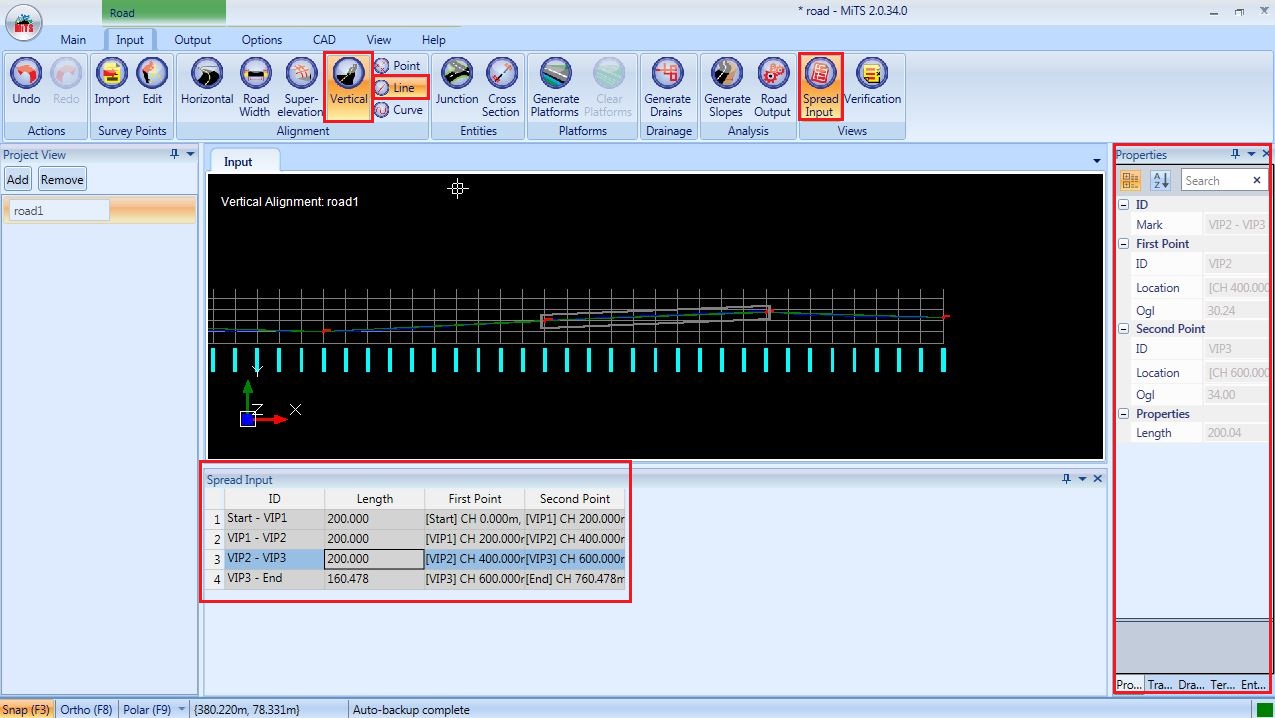
Vertical Line Properties Table #
The length of the chainage between VIP and the details of the connecting chainage can be viewed from Vertical Line Spread Input or properties.
Vertical Point #
Users have to select the “ Vertical Alignment” and “ Point” icon before editing the vertical point properties.

The VIP points in the drawing can be dragged to any location by clicking the point on the graph. If an intermediate VIP point is deleted, the road will join the VIP point before and after the deleted point.
Point properties can be inputted in Spread Input or select a VIP point and input the VIP point properties in the properties tab.

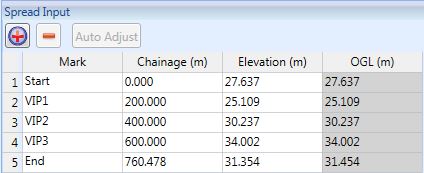
Vertical Points Properties Table #
The elevation and chainage of the VIP points can be edited in spread input. The VIP Points mark can be changed too.
If a user dragged a VIP point to a new location, the new chainage and elevation of the point will be auto updated in the spread input and properties tab.
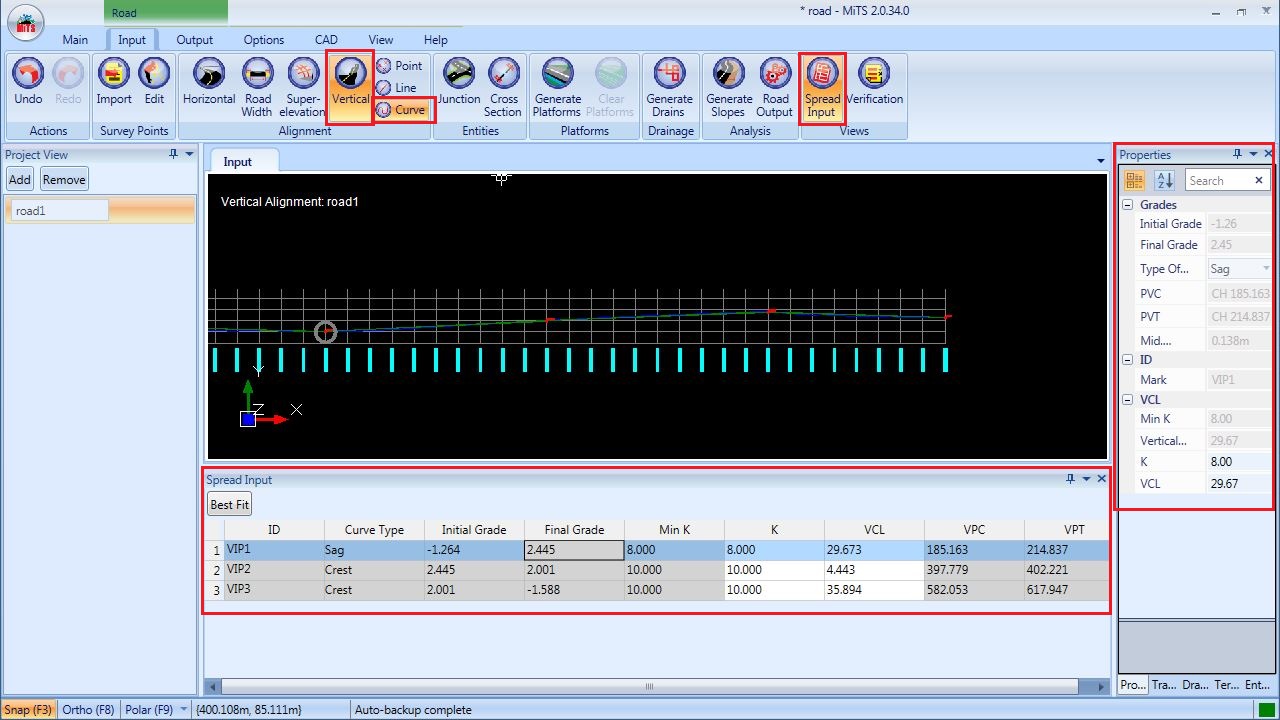
Vertical Curve #
Select “ Vertical Alignment” and “ Curve” to generate the best fit vertical alignment.

Vertical Curves Properties Table #
Users are allowed to edit the vertical curve design at properties tab or at Vert. Curves Properties Table.

I’m the Benevolent Dictator for Life for MiTS Software cum Editor of this website. Read more here.
You can also contact me at soonhui@mes100.com


