CAD Layout at Project Parameters #
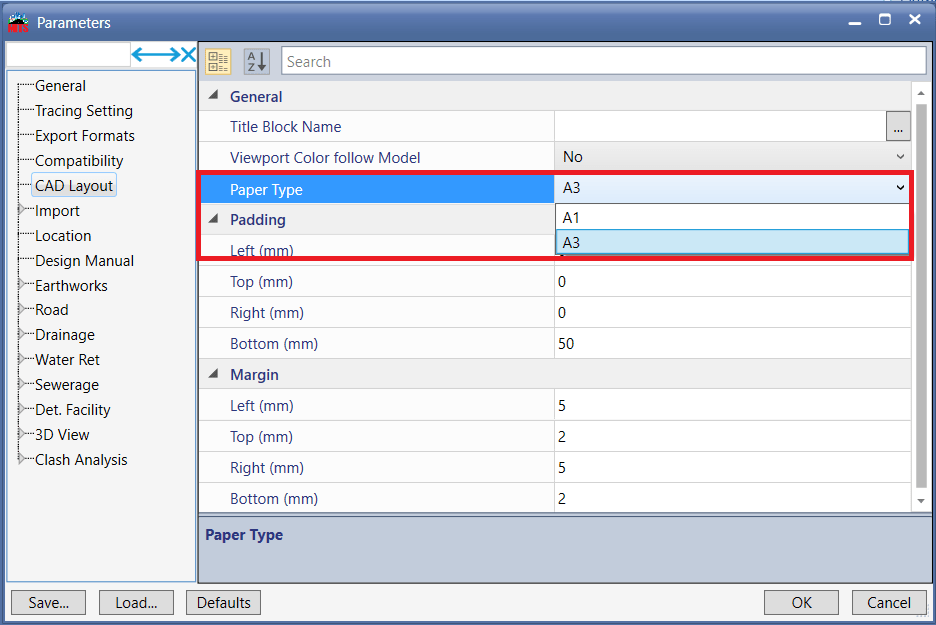
Go to Project Parameters > CAD Layout > and modify value for ‘Margin’ or ‘Padding’ and input title block

Note:
Padding – space reserved allocation in mm for meta information i.e: company information inside the title block
Margin – space in mm between viewport boundary and paper edge
General #
To import the Title Block, user may click the button at the Title Block Name and select the Title Block drawing.

Next, User may set the paper size of the layout. Then, click ‘OK’.
Padding #
Users will be required to measure the actual space reserved for the meta-information and use the information to set the padding information.
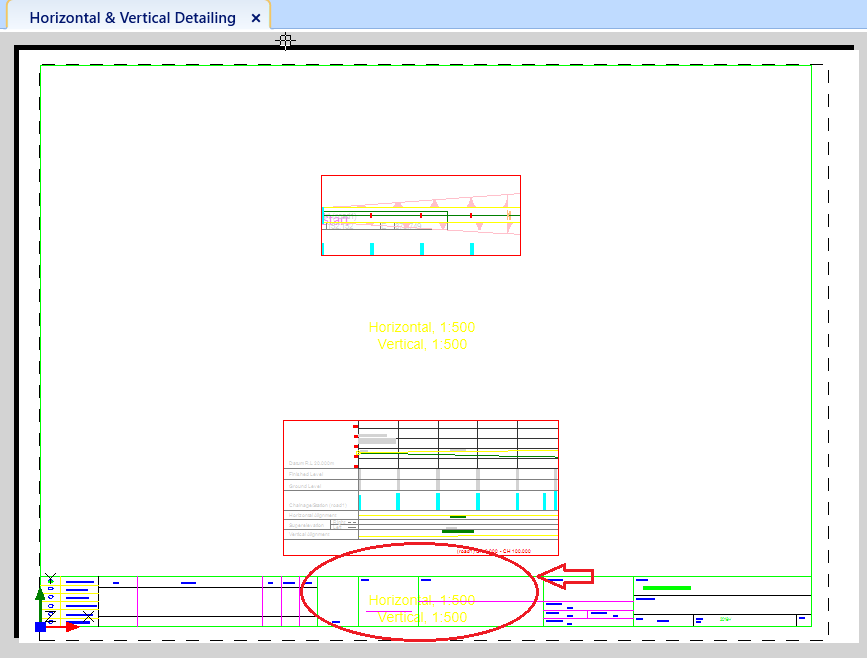
Case 1: Padding value is not set

For case 1, you can see when the padding value is not set, hence the vertical detailing will overlapped with vertical detailing as image below:
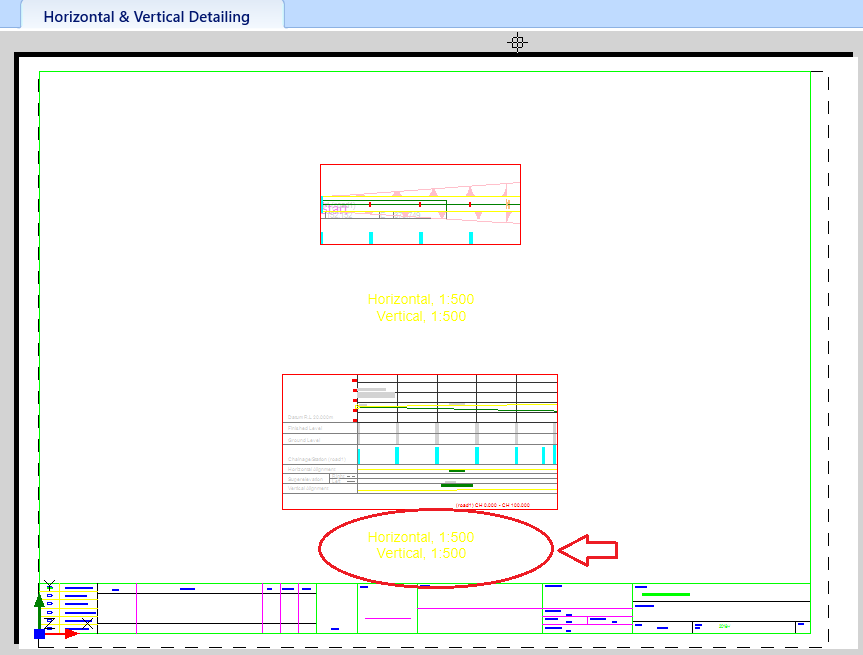
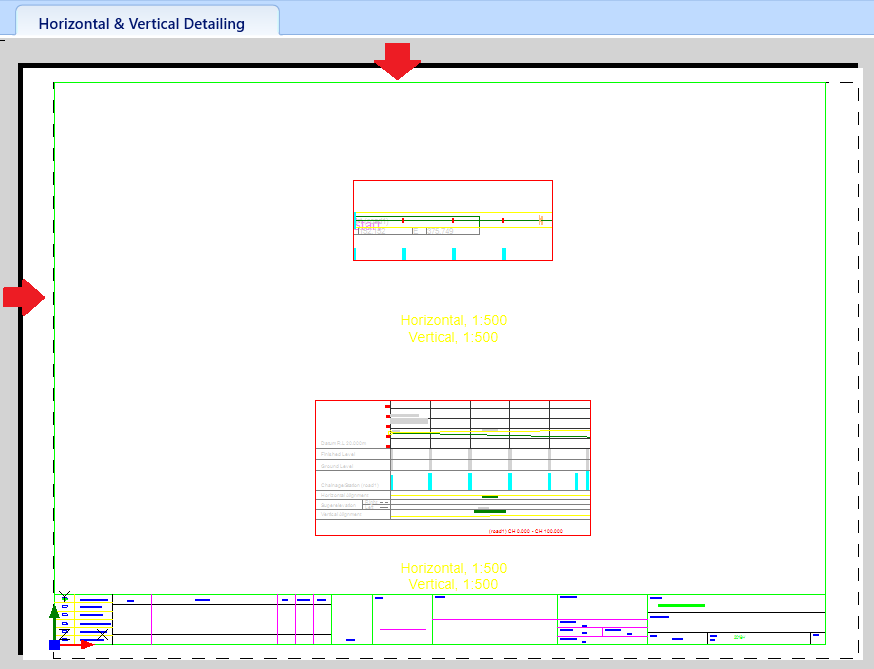
Case 2: Padding value is set in the parameter (i.e: bottom padding set to 70mm)

For case 2, when the bottom padding is set to a certain value (i.e: 70mm), user can see that there is space allocated and vertical detailing no longer overlapped with title block
Margin #
This is represented by the dotted line and it is the printable area or printer margins for a given sheet and a given printer/plotter.
Do ensure the title block is within these margins, if not they will not be print/plot.
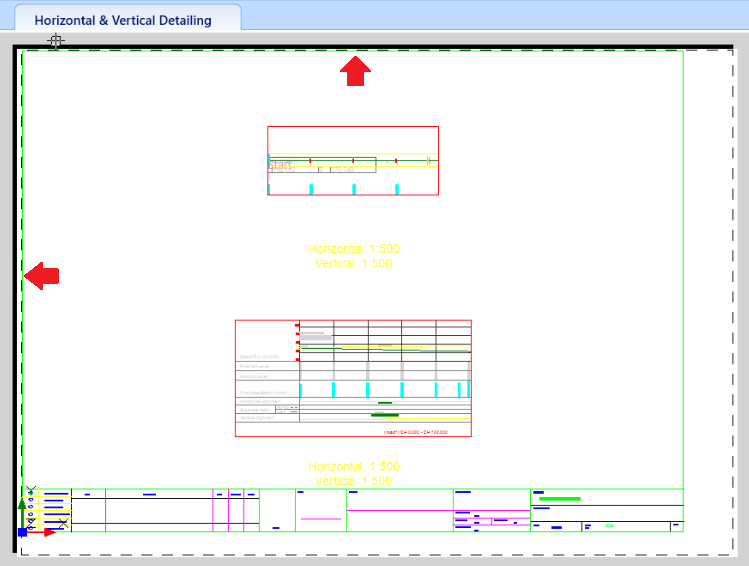
Case 1: Default margin value

As default setting, users can see that the title block will stick to the LEFT and TOP margin.
Case 2: Margin value is set in the parameter (i.e: left 30mm and top 15mm)

User can see the margin on top and left will have some space from the paper edge as image below:
Notes:
- When the title block is imported, by default the title block will stick to the Top and Left side of the margins.
- Hence, user will require to edit the margin value to allow some space between the margin and paper edge

I’m the Benevolent Dictator for Life for MiTS Software cum Editor of this website. Read more here.
You can also contact me at soonhui@mes100.com


